


Last updated on September 6th, 2024 at 07:05 pm
We have now successfully built a basic application with a route defined that returns just a message. Now lets structure our project and start building our API.
Structure of the Project:
- We will structure our project in the MVC pattern.(*We don’t have a view with UI since this is only backend but the routes can be considered as view since these endpoints are used to build a view in front end application)
```
src/

    config/
        dbConfig.js

    models/
        noteModel.js

    controllers/
        noteController.js

    routes/
        noteRoute.js

    server.js
    package.json
    .env
    ```
Setting up the database:
- Create a new database in PostgreSQL. You can use pgAdmin or SQLTools to create a new database.
- If you don’t have PostgreSQL installed on your machine, you can download and install it from the official website here.
- Create a new table in the database to store the notes data. You can use the following SQL query to create the table:
CREATE TABLE notes (
    id SERIAL PRIMARY KEY,
    title VARCHAR(255) NOT NULL,
    description TEXT,
    is_liked BOOLEAN DEFAULT false,
    difficulty INTEGER,
    created_at TIMESTAMP DEFAULT CURRENT_TIMESTAMP
);
- The notes table has the following columns:
- id: The primary key of the note.
- title: The title of the note (String).
- description: The description of the note(String).
- A boolean field that indicates whether the note is liked or not.
- difficulty: An integer field that indicates the difficulty level of the note.
- The timestamp when the note was created or updated.
- You can use pgAdmin or SQLTools to execute the SQL query and create the table in the database.
Establishing a connection to the database:
- Create a new file db.config.js inside the config directory.
- To access the database credentials stored securely in the .env file, we will first require the dotenv package and then call the config() method to load the environment variables.
- We need to require the pool class from the pg package to create a new pool instance that will manage the database connections.(Pooling is a technique used to manage multiple connections to the database. With connection extablished through pooling we can reuse the connections and avoid the overhead of creating new connections each time a request is made to the database.)
- Once the pool instance is created, we can export a query method that will execute the SQL queries using the pool instance.
- Add the following code to the db.config.js file:
require('dotenv').config();
const { Pool } = require('pg');


const pool = new Pool({
    host: process.env.HOST,
    user: process.env.USERDB,
    database: process.env.DB,
    password: process.env.PASSWORD,
    port: process.env.PORT
});

module.exports = {
    query: (text, params) => pool.query(text, params),
};
Now with the database setup and connection established, we can move on to creating the model for our notes data. In The model class we will define the schema for our notes data. We will be able to write SQL queries to interact with the database using the pool instance we created in the db.config.js file.
Creating the model(Note Model):
- Create a new file note.model.js inside the models directory.
- In the note.model.js file, we will define the schema for our notes data. We will create a class Note that will have methods to interact with the database.
- We will define methods to create a new note, get all notes, get a single note by id, update a note, delete a note, and delete all notes.
- In our example we are storing the table name in a variable called table_name. This is useful if you want to change the table name in the future, you can just update the variable value. This also reduces the chances of errors due to typos in your queries.
- Inside of our class, we are first defining a note constructor that takes the title, description, is_liked, and difficulty as arguments. We are setting the created_at field to the current timestamp using the new Date() method.
- We are creating static methods to interact with the database. We will be creating following methods:
- create: This method will insert a new note into the database.
- findAll: This method will get all notes from the database.
- findById: This method will get a single note by id from the database.
- update: This method will update a note by id in the database.
- remove: This method will delete a note by id from the database.
- removeAll: This method will delete all notes from the database.
note: if you come from experience of writing SQL queries for mySQL ,you will find the syntax of SQL queries for Postgres to be very similar. But there are some differences in the syntax used in PostGres. I have run into issues mixing up the syntax of mySQL and Postgres. So be cautious and check for those differences if you are coming from mySQL background. Refer to the official documentation for Postgres for more details.For eg: In Postgres we use SERIAL instead of AUTO_INCREMENT for creating a primary key that auto increments, when passing parameters to the query we use $1,$2,$3 instead of ? in mySQL etc.
Also if you are uisng AI tools like Github Copilot, ChatGPT, your AI assistant might suggest you the syntax for mySQL instead of Postgres. So be cautious and verify the syntax before running the queries.(I am saying this from my own personal experience)
const db = require('../config/dbConfig');

class Note {

    static tableName = 'notes';
    static date = new Date();
    static createdAtStamp = Note.date.toLocaleString()

    constructor(note) {
        this.title = note.title;
        this.description = note.description;
        this.isLiked = note.isLiked;
        this.difficulty = note.difficulty;
        this.createdAt = note.createdAt;

    }


    static create(newNote) {
        return db.query(`INSERT INTO ${this.tableName} (title, description, is_liked,difficulty,created_at) VALUES ($1,$2,$3,$4,$5)`,
            [newNote.title, newNote.description, newNote.isLiked, newNote.difficulty, newNote.createdAt]);
    }

    static findAll() {
        return db.query(`SELECT * FROM  ${this.tableName}`);
    }
    static findById(id) {
        return db.query(`SELECT * FROM ${this.tableName} WHERE id = $1`, [id])
    }

    static update(updatedNote, id) {
        return db.query(`UPDATE ${this.tableName}
        SET title = $1, description = $2, is_liked = $3,difficulty = $4, created_at = $5
        WHERE ID = $6`, [updatedNote.title, updatedNote.description, updatedNote.isLiked, updatedNote.difficulty, updatedNote.createdAt, id])

    }

    static delete(id) {
        return db.query(`DELETE FROM ${this.tableName} WHERE id = $1`, [id])

    }

    static deleteAll() {
        return db.query(`DELETE FROM ${this.tableName}`)

    }
}

module.exports = Note;
note: If you pay attention to sql queries, the variables are passed as parameters to the query using $1,$2,$3 etc. This is a good practice to prevent SQL injection attacks. The pg package automatically sanitizes the input parameters to prevent SQL injection attacks.
Note Controller:
In the controller module we will define the logic for handling the requests and responses. The controller will interact with the model to perform CRUD operations on the notes data.
All functions in the controller module will be asynchronous functions that will use the await keyword to wait for the database operations to complete.
We will export these functions from the controller module so that they can be used in the routes module to handle the API requests.
First, we will create a new file note.controller.js inside the controllers directory. Then we will require the Note model class from the models directory so that we can interact with the database. We will define the following functions in the controller module:
- createNote: This function will create a new note.
- getAllNotes: This function will get all notes.
- getNoteById: This function will get a single note by id.
- updateNotebyId: This function will update a note by id.
- deleteNoteById: This function will delete a note by id.
- deleteAllNotes: This function will delete all notes.
noteController.js file should look like this:
const Note = require('../model/note')

exports.createNote = async (req, res) => {
    const date = new Date();
    const createdAtStamp = date.toLocaleString();

    try {
        const { title, description } = req.body;
        const newNote = {
            title,
            description,
            isLiked: false,
            difficulty: 1,
            createdAt: createdAtStamp
        }
        const notes = await Note.create(newNote)
        res.status(201).json(notes.rows);
    } catch (error) {
        res.status(500).send({ message: 'Error creating note', error: error.message });
        throw (error)

    }
}

exports.getAllNotes = async (req, res) => {

    try {
        const notes = await Note.findAll()
        res.status(200).json(notes.rows);
    } catch (error) {
        res.status(500).send({ message: 'Error fetching notes', error: error.message });
        throw (error)

    }

}

exports.getNoteById = async (req, res) => {

    try {
        const id = req.params.id;
        const note = await Note.findById(id);
        res.status(200).json(note.rows);

    } catch (error) {
        res.status(500).send({ message: 'Error fetching notes', error: error.message });
        throw (error)
    }
}

exports.updateNoteById = async (req, res) => {
    const date = new Date();
    const createdAtStamp = date.toLocaleString();
    try {
        const id = req.params.id;
        const { title, description, is_liked, difficulty } = req.body;
        const updatedNote = {
            title,
            description,
            isLiked: is_liked,
            difficulty,
            createdAt: createdAtStamp
        }
        const note = await Note.update(updatedNote, id)
        res.status(200).send({ message: `updated item ${note.rows}` })
        // res.status(200).json(note.rows)

    } catch (error) {
        res.status(500).send({ message: 'Error updating notes', error: error.message });
        throw (error)

    }
}

exports.deleteNoteById = async (req, res) => {
    try {
        const id = req.params.id;
        const note = await Note.delete(id);
        res.status(200).json(note.rows)

    } catch (error) {
        res.status(500).send({ message: 'Error deleting note', error: error.message });
        throw (error)

    }
}

exports.deleteAll = async (req, res) => {
    try {
        const notes = await Note.deleteAll();
        res.status(200).send({ message: "All data deleted , the table is now empty" })

    } catch (error) {
        res.status(500).send({ message: 'Error deleting all notes', error: error.message });
        throw (error)

    }
}
note1: In createNote and updatNote function we are passing the request body as an argument to the Note.In createNote function isLiked, difficulty and createdAt are preset values that are passed to the Note constructor( isLiked is false by default, difficulty is 1 by default and createdAt is the current timestamp). In updateNote function we are passing the timeStamp as the preset value(current timeStamp, when the note is updated) while rest of the values are passed from the request body,meaning they can be updated by the user from the client side.
note2: It is essential to implement error handling in your controller functions. In our example, we are using try-catch blocks to catch any errors that occur during the database operations. We are sending the error message as a response to the client if an error occurs.With this in place we can stay assured that if any error occurs during the database operations we can catch it and be aware of the cause of the error.( Feel free to implement more detailed error handling as per your requirements).These error messages can be helpful in debugging and troubleshooting the issues that might occur in the future.
API routes:
In the routes module, we will define all the route definitions for our API. We will use Express Router to define the routes. Each route will map to a specific controller function that we just defined in the controller module.To do this lets do the following:
- Create a new file notes.js inside the routes directory.
- Require the express module and create a new router instance using the express.Router() method.
- Require the noteController module so that we can use the controller functions to handle the API requests.
- Define the route definitions for our API. We will create the following routes:
- POST / – Create a new note
- GET / – Get all notes
- GET /:id – Get a single note by id
- PUT /:id – Update a note by id
- DELETE /:id – Delete a note by id
- DELETE / – Delete all notes
- Export the router instance so that it can be used in the server module to define the API routes.
const express = require('express');
const router = express.Router();
const notesController = require('../controller/noteController');

router.post('/', notesController.createNote);

router.get('/', notesController.getAllNotes);

router.get('/:id', notesController.getNoteById);

router.put('/:id', notesController.updateNoteById);

router.delete('/:id', notesController.deleteNoteById);

router.delete('/', notesController.deleteAll);


module.exports = router;
Setting up the server to use the routes:
Now that we have all the pieces of our API in place. We will do the following :
- In our existing server.js file, require the routes module so that we can use the routes to define the API endpoints.
- Use app.use() method to define the base route for our API. We will use the /api/notes route as the base route for our API.
- Now our api is almost ready for testing. But before we start testing we need json middleware to parse the request body. We will use express.json() middleware to parse the request body as JSON. `app.use(express.json())`. This middleware will parse the request body and make it available in the req.body property of the request object.
the final server.js file should look like this:
const express = require('express');
const db = require('./src/config/dbConfig');
// const connection = require('./src/config/dbConfig')
const cors = require('cors')
const app = express();

const corsOptions = {
    origin: ['http://localhost:3000', 'http://localhost:3001', 'http://localhost:3002'],
    optionsSuccessStatus: 200
}

const PORT = process.env.PORT || 4000;

const noteRoutes = require('./src/route/notes')

app.use(express.json());

app.use(cors(corsOptions));

app.use('/api/notes', noteRoutes);

app.get("/", (req, res) => {
    res.json({ message: "Welcome to notes app with postGreSQL." });
})

app.listen(PORT, () => {
    console.log(`Server is currently running on port:${PORT} go to http://localhost:${PORT}`)
})
Testing the API Endpoints using Postman/Thunder Client:
Now that we have built our REST API, it’s time to test it using Postman or Thunder Client. We will test the API endpoints to create, retrieve, update, and delete notes data.
- Start the server by running the command `nodemon server.js` in the terminal.
- Open Postman or Thunder Client and create a new request to test the API endpoints.
- Send a POST request to http://localhost:4000/api/notes to create a new note. Pass the title, description, is_liked, and difficulty in the request body as JSON.
- Send a GET request to http://localhost:4000/api/notes to get all notes.
- Send a GET request to http://localhost:4000/api/notes/:id to get a single note by id.(Here :id is the id of the note you want to retrieve.)
- Send a PUT request to http://localhost:4000/api/notes/:id to update a note by id. Pass the title, description, is_liked, and difficulty in the request body as JSON.(Here :id is the id of the note you want to update.)
- Send a DELETE request to http://localhost:4000/api/notes/:id to delete a note by id.(Here :id is the id of the note you want to delete.)
- Send a DELETE request to http://localhost:4000/api/notes to delete all notes.
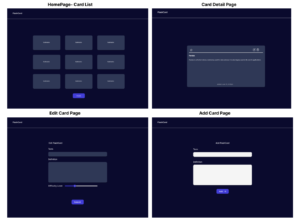
Checkout the Screenshots below for the API testing in Postman:


Conclusion:
In this tutorial, we embarked on the journey of building a robust REST API using Node.js, Express, and PostgreSQL. We began by creating dedicated endpoints to CRUD – create, retrieve, update, and delete – our notes data.To ensure our project remains maintainable and scalable as it grows, we structured it using the MVC (Model-View-Controller) pattern. With our foundation set, we created a PostgreSQL database and honed our skills in executing SQL queries.Recognizing that errors are a part of life (and coding), we implemented robust error handling within our controller functions. This proactive approach ensures that any hiccups during database operations are gracefully caught and managed. Before we declared victory, we thoroughly tested our API using industry-standard tools like Postman/Thunder Client. This crucial step allowed us to verify that every endpoint functioned flawlessly as expected.
In short, we successfully constructed a powerful REST API ready to be seamlessly integrated into any frontend application.
From now on, you can confidently communicate with your PostgreSQL database, empowering your applications with dynamic data persistence. With this knowledge you can now build your own REST API’s and explore the endless possibilities of building applications with Node.js, Express, and PostgreSQL. Happy Coding!
Source Code:
For full Source code ,checkout the Github repo:
Github–rest-api-nodejs-postgres-notes-app
References:
If you need more practice or would like to check out how to build similar API with variations. Checkout following articles:
- How to build a REST API with NodeJS and MongoDB(driver)
- How to build a REST API with NodeJS and MySQL